HomeHow we build
What it actually takes.
Most solar websites show a finished array at golden hour. Useful for nobody. This is the sequence that puts one there, photographed on our own sites.
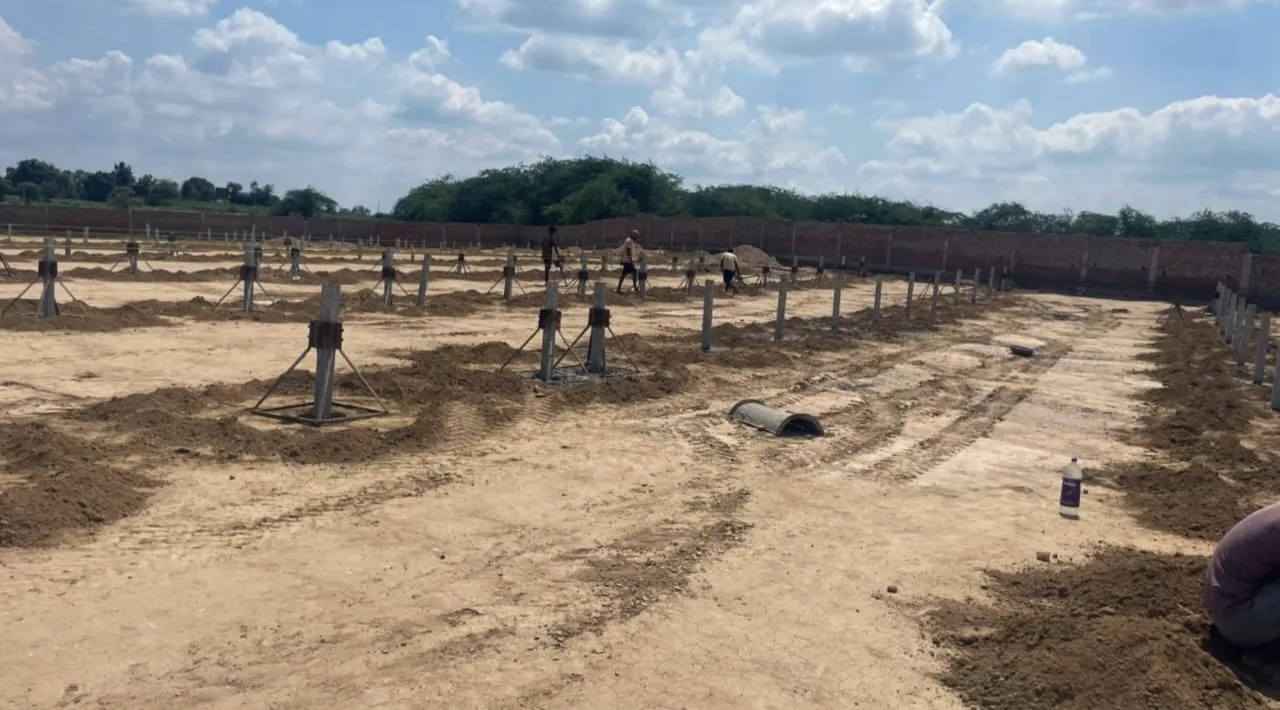
Survey and setting out
Before anything is driven into the ground we walk the site. Shading through the day, ground conditions, access for plant, and where the array can actually go — which is rarely exactly where the drawing says. Pile positions are then set out against the real terrain.
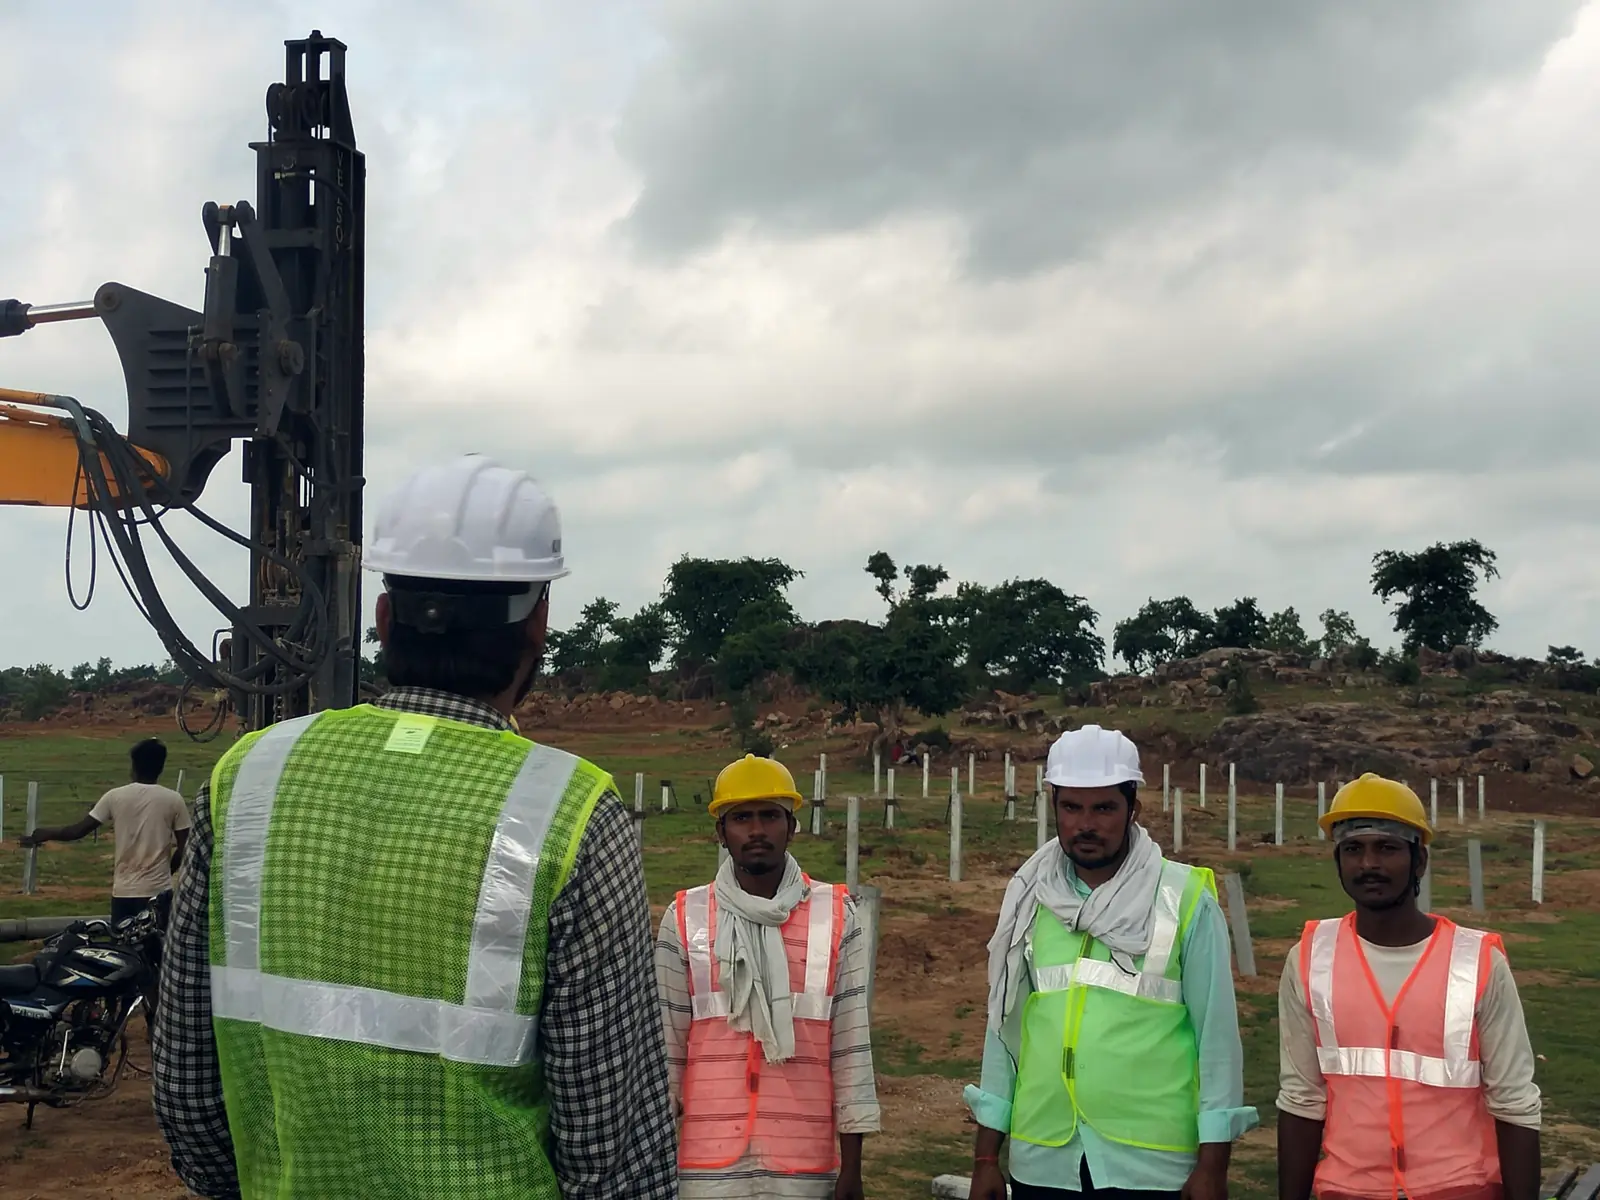
Pile driving
Foundation piles are driven to depth with a tracked rig. Depth is determined by the ground, not by a standard figure applied everywhere. Each pile is checked for line and level before the rig moves on, because a pile that is out at this stage is out forever.
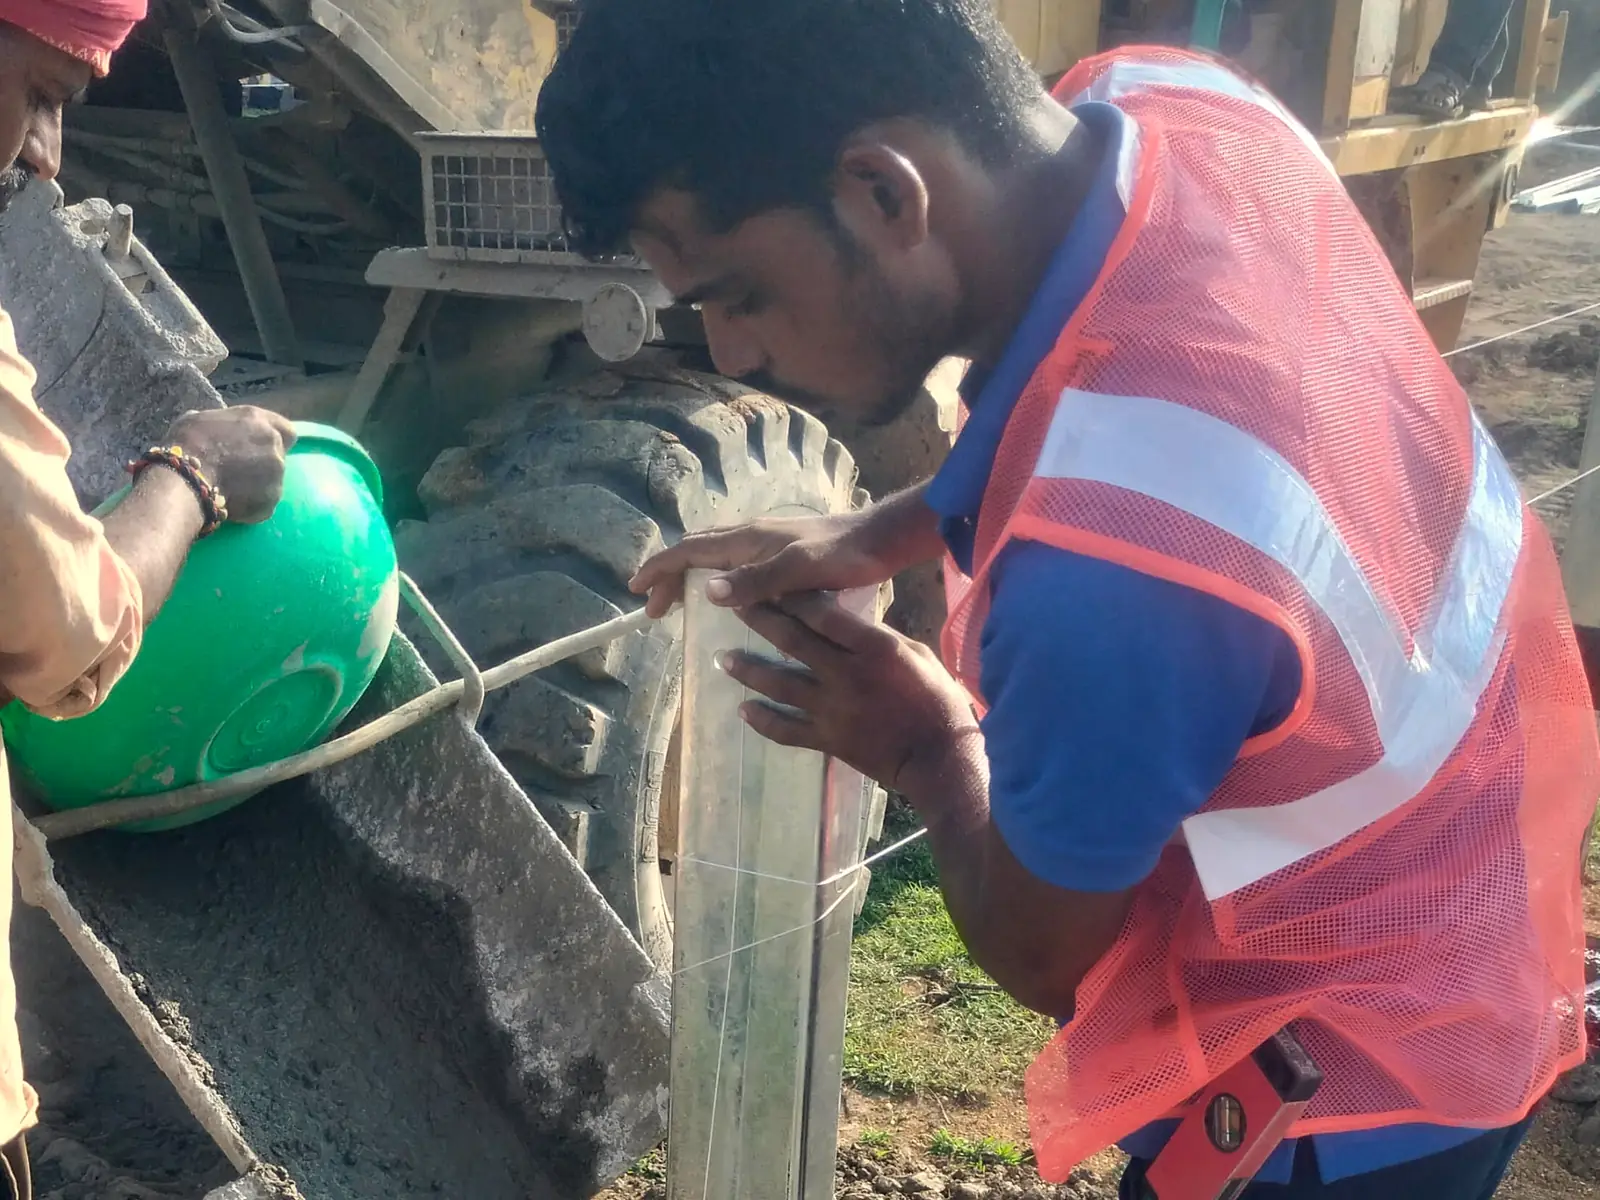
Foundations set and levelled
Piles are braced, plumbed against a string line and concreted. This is the least photogenic stage and the one that decides whether the array is still straight in fifteen years. It is also the stage most often rushed by whoever quoted lowest.
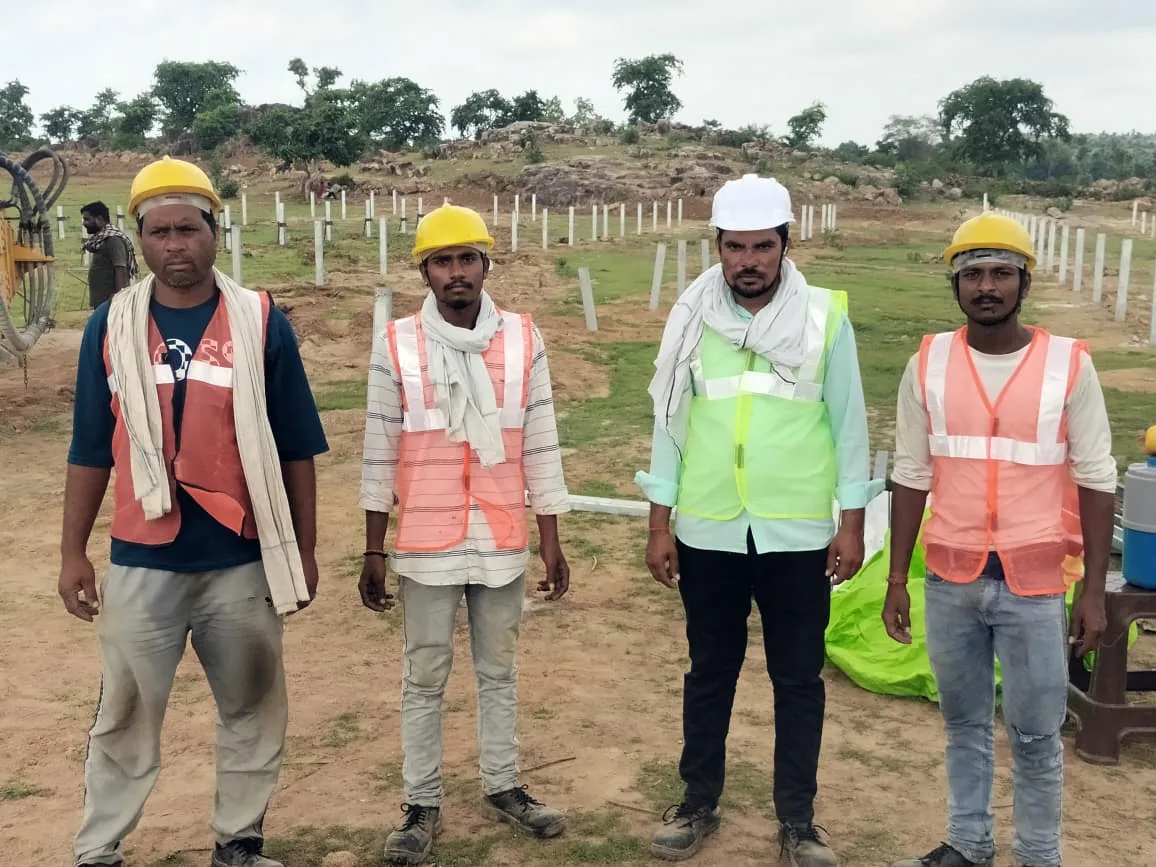
Crew, supervision and safety
Directly employed crews in hi-vis with a site engineer present. We do not hand the build to a subcontractor and hope it comes back right. The people in these photographs are the people who will be on your site.
05 What comes next
Structure, array, wiring, commissioning.
After the foundations come the mounting structure, the modules, the DC and AC wiring, earthing and protection, then testing and grid synchronisation.
Photography of these stages is being collected and will be added here. We would rather show a gap than fill it with a stock photograph of somebody else’s site.
Come and see a site.
The clearest way to judge how a company builds is to stand on something it has built. Ask us.